Staking & Unstaking
This page will guide you through the process of staking and unstaking nodes.
Introduction
Before staking, a node is a mere observer. After staking, the node becomes a validator, which means that it will be eligible for consensus and will earn rewards. Validators play a central role in the operation of the network.
Staking is the process by which the operator of the node sends a sum of 2500 EGLD to be locked in a system SmartContract. Multiple nodes can be staked at once, and their operator must lock 2500 EGLD for each of the nodes. This sum acts as a collateral, and it will be released back to the node operator through the process of unstaking, with a final step called unbonding.
A validator node produces rewards, which are transferred to the node operator at their reward address of choice, decided upon during the staking process. The reward address may be changed after staking as well.
Each staking or unstaking process requires a transaction to be sent to the Staking Smart Contract. These transactions must contain all the required information, encoded properly, and must provide a high enough gas limit to allow for successful execution. These details are described in the following pages.
There are currently 2 supported methods of constructing and submitting these transactions to the Staking SmartContract:
- Manually constructing the transaction, then submitting it to wallet.multiversx.com;
- Automatically constructing the transaction and submitting it using the
mxpycommand-line tool.
The following pages will describe both approaches in each specific case.
Prerequisites
In order to submit a staking transaction, you must have the following:
- 2500 EGLD for each node and 0.006 EGLD per node as transaction fee
- A unique
validatorKey.pemfile of each node
You have the option of staking through the online Wallet at https://wallet.multiversx.com or by using mxpy.
Staking through the Wallet
- Go to https://wallet.multiversx.com and log into your wallet
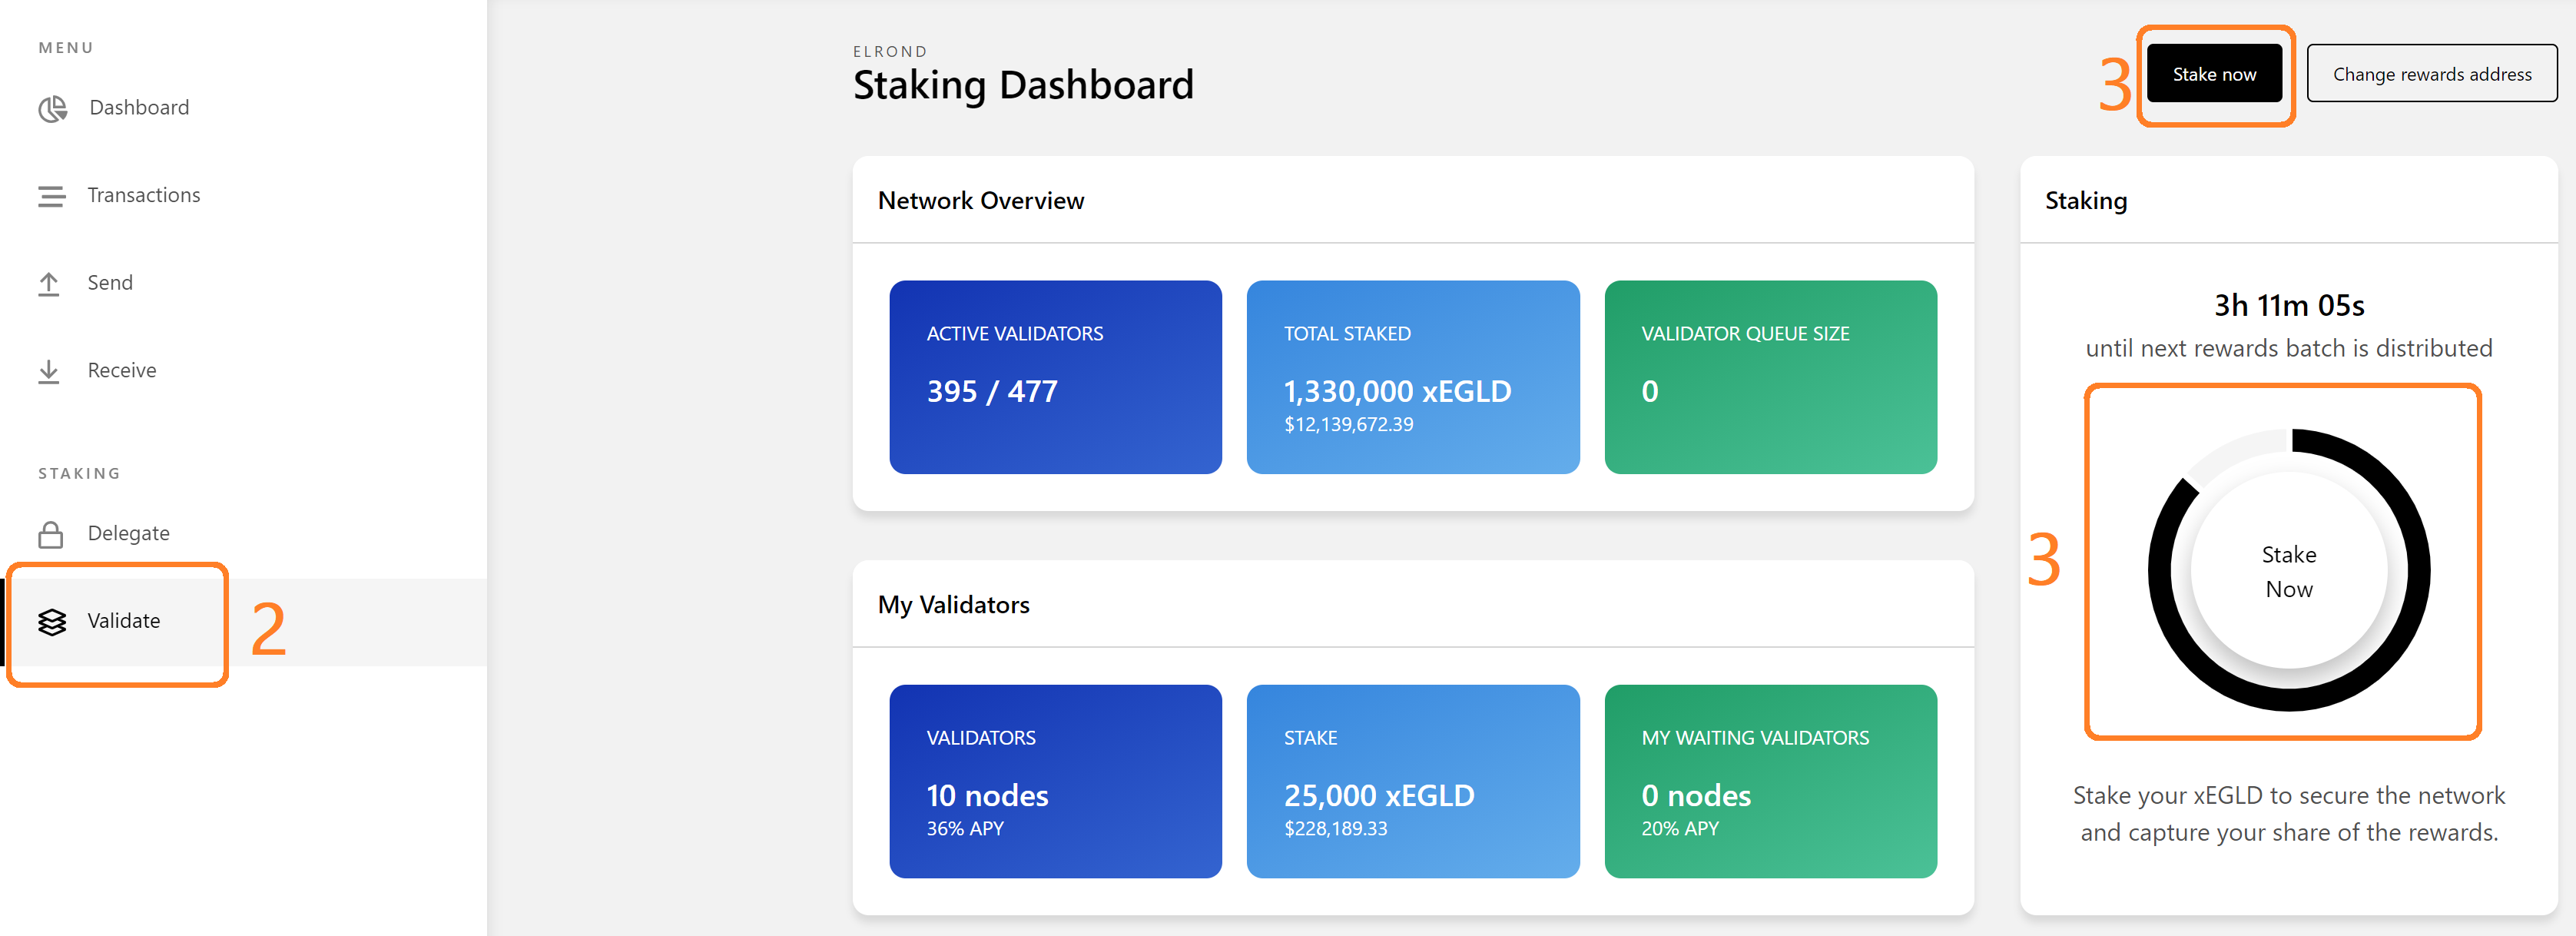
- Go to the Validate section
- Press "Stake now"
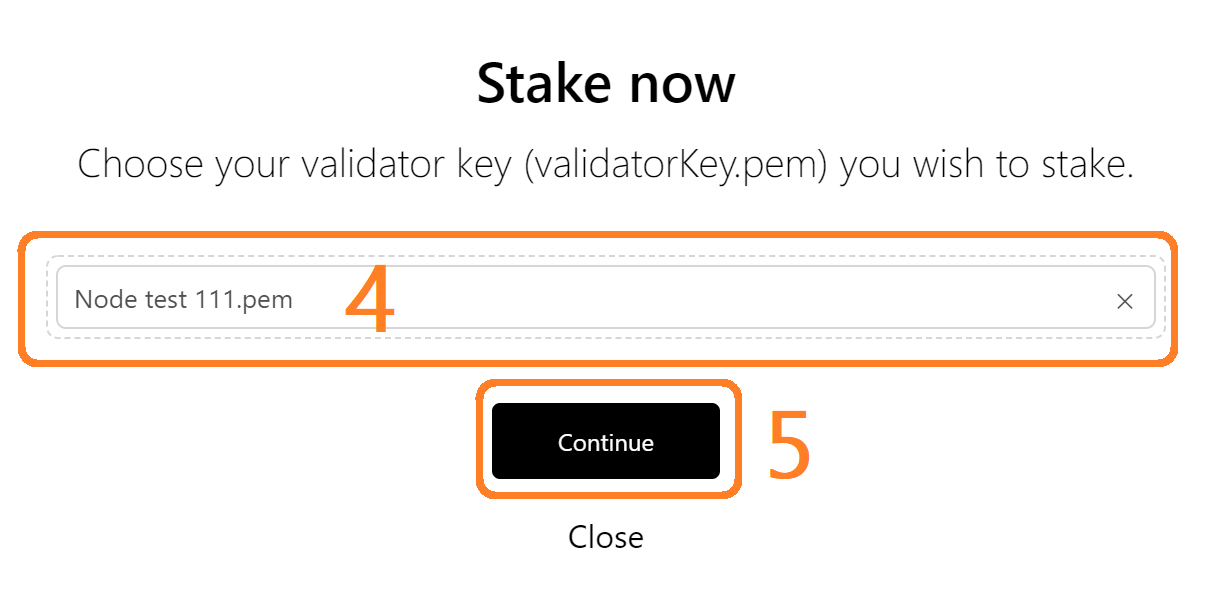
- Navigate to the location of the .pem file or drag & drop it
- Press "Continue"
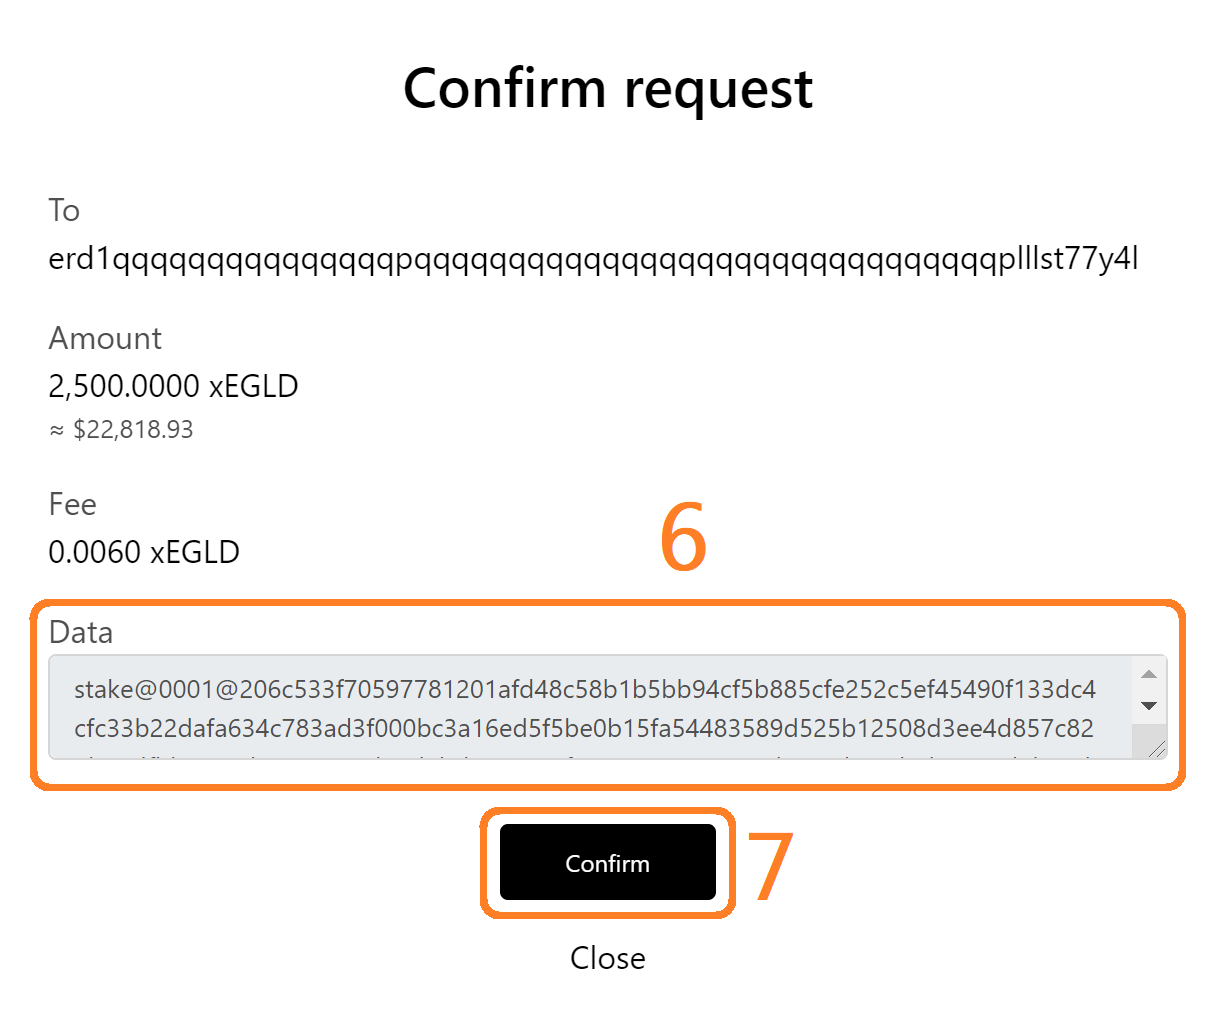
- The staking transaction data is automatically populated using the public key in the .pem certificate you provided. The private key is not touched and the data does not leave your browser. Only the transaction with this public information will be sent to the network once you press Confirm
- Press "Confirm"
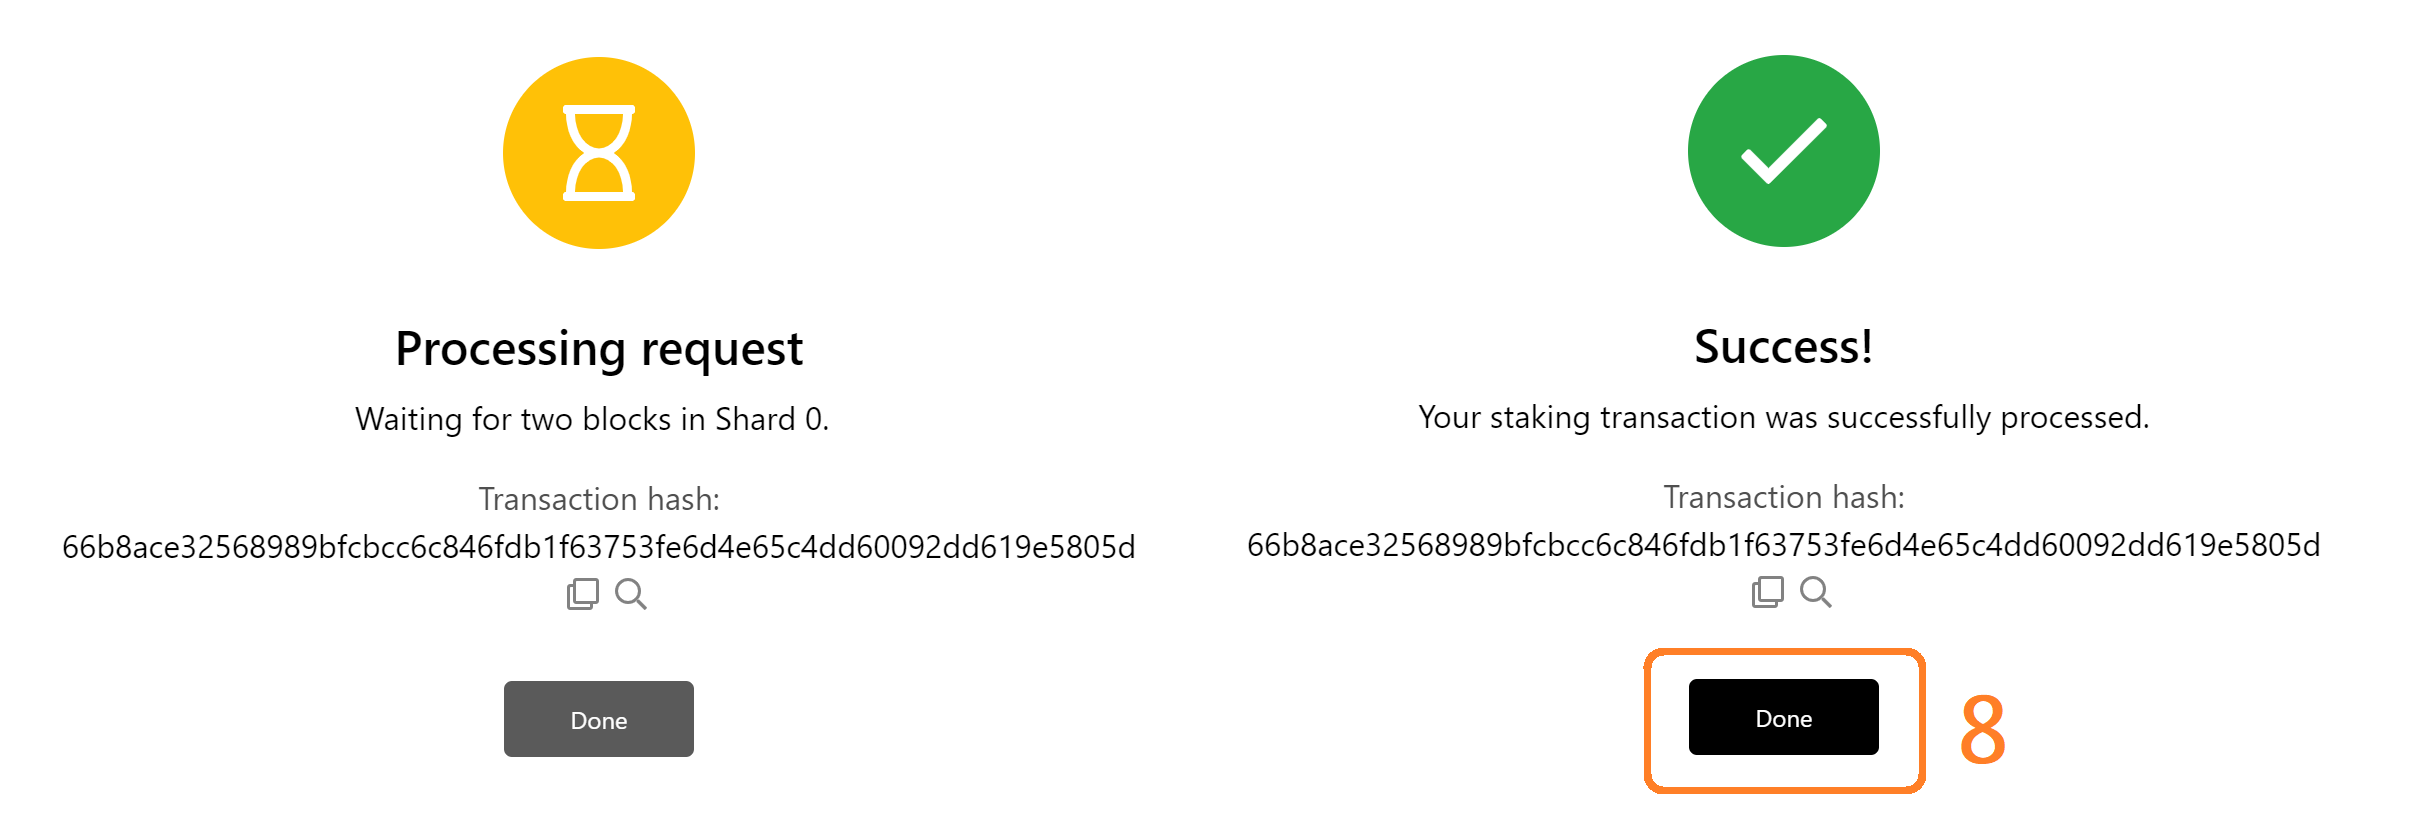
- The status of the transaction will be displayed on screen, together with a success message. Click "Done" once you see the Success message.
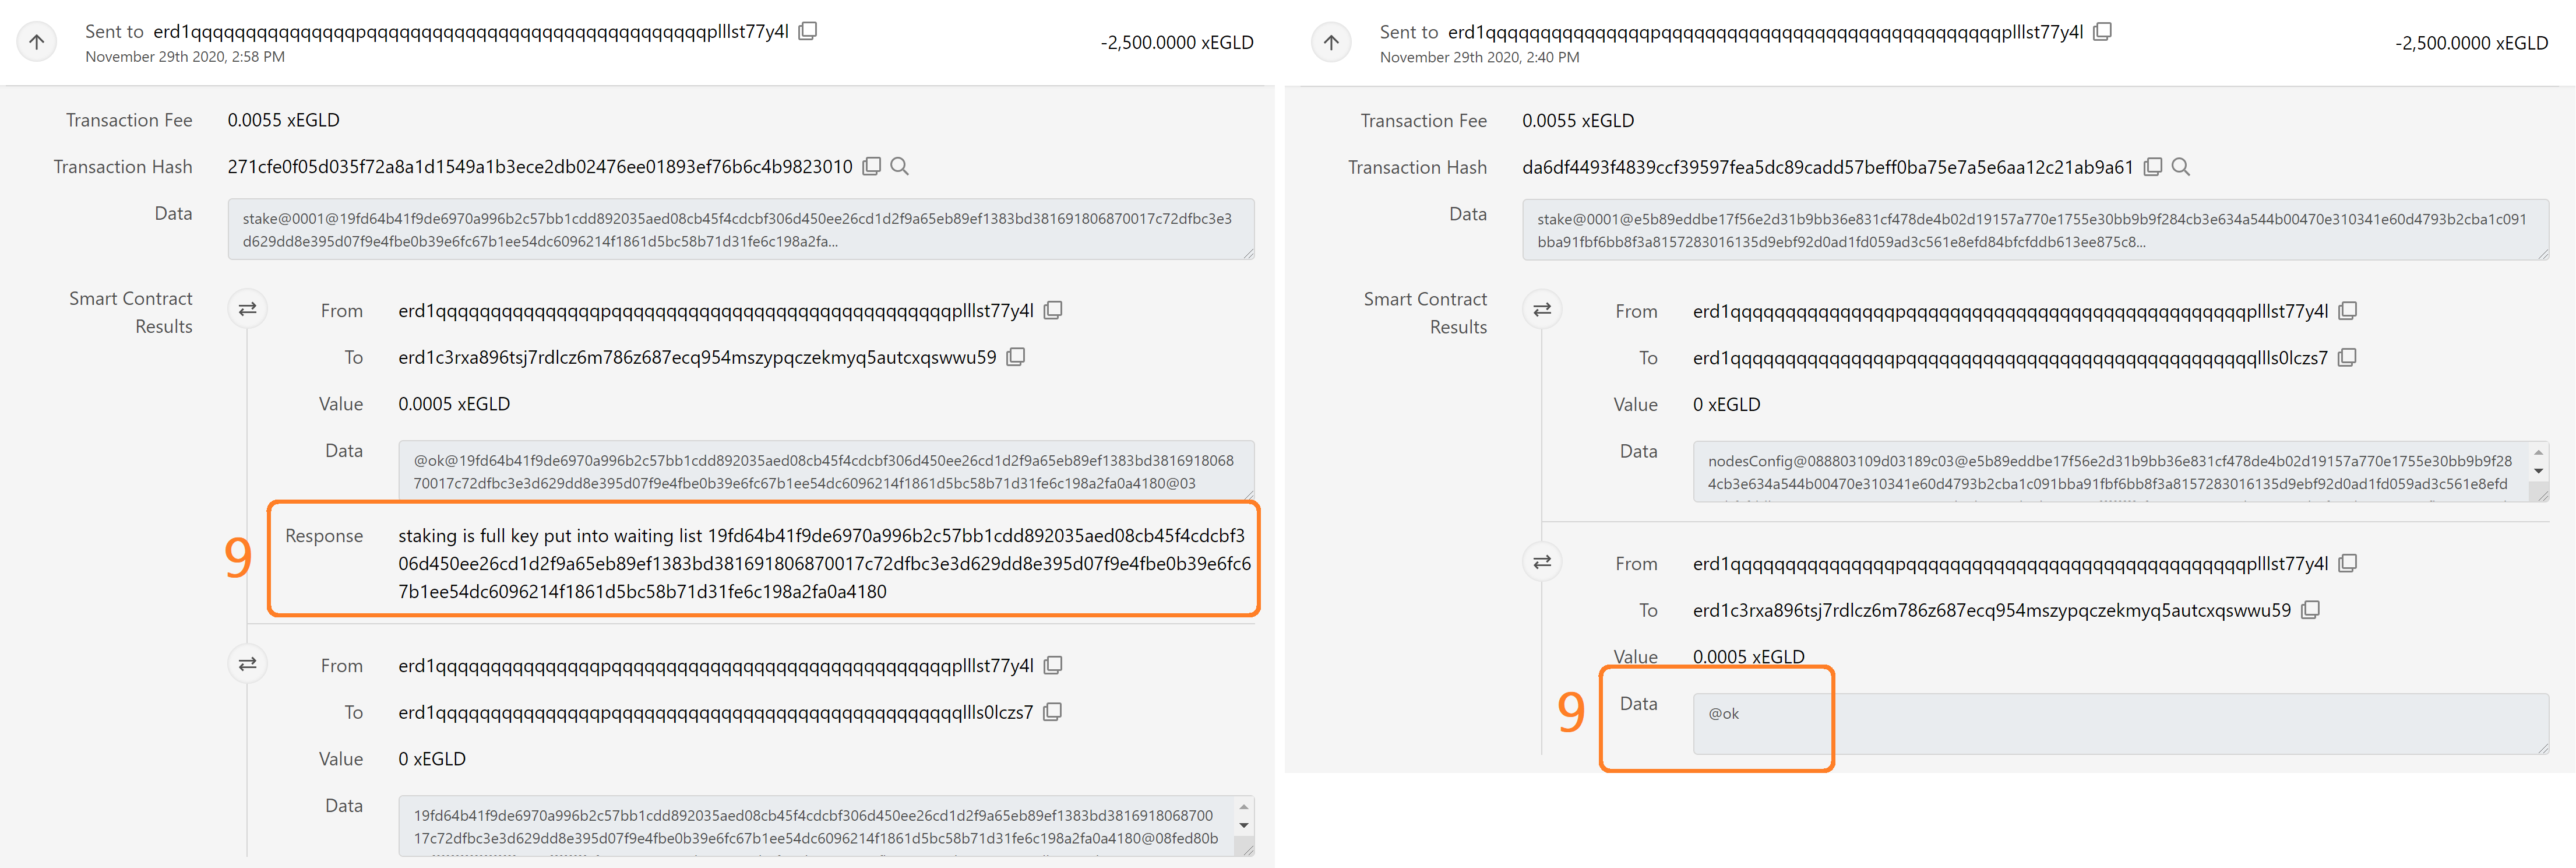
- You can review the transaction in your history. Based on the current staking capacity of the network, you will get an OK message indicating that your node has become a validator, or a response indicating that the network staking is at capacity and your node has been put in the Queue.
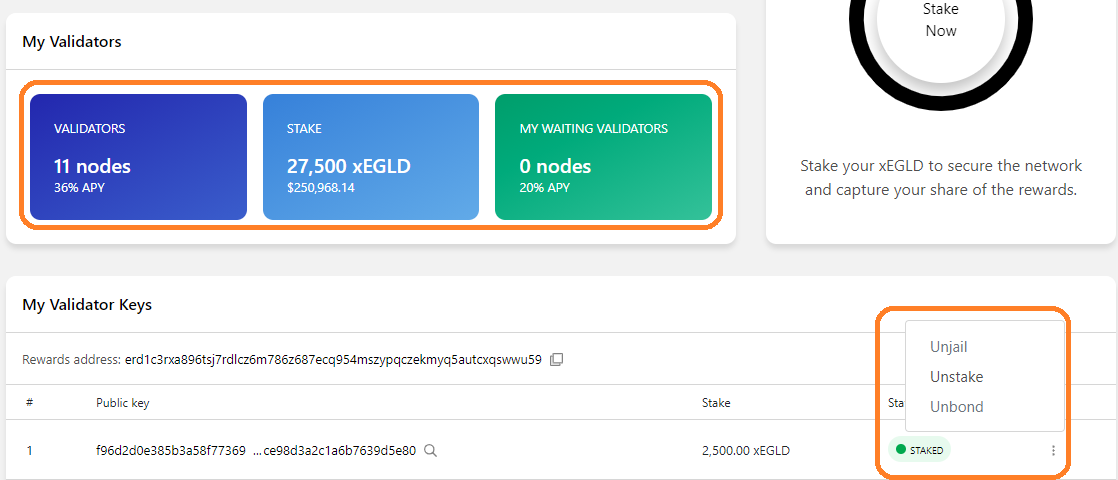
- The information about the staked nodes from the current wallet will be updated
- You can further interact with your node(s) by clicking on the three vertical dots next to the public key, which brings up a menu for performing actions such as Unjail, Unstake and Unbond.
Staking through mxpy
Submitting the staking transaction using mxpy avoids having to write the "Data" field manually. Instead, the staking transaction is constructed automatically by mxpy and submitted to the network directly, in a single command.
Make sure mxpy is installed by issuing this command on a terminal:
mxpy --version
The version reported by this command must be at least mxpy 0.8.0, or higher. If mxpy is not installed (command not found), or if the version is lower, please follow these instructions.
Make sure mxpy is installed and has the latest version before continuing.
Your Wallet PEM file
To send transactions on your behalf without using the online MultiversX Wallet, mxpy must be able to sign for you. For this reason, you have to generate a PEM file using your Wallet mnemonic.
Please follow the guide Deriving the Wallet PEM file. Make sure you know exactly where the PEM file was generated, because you'll need to reference its path in the mxpy commands.
After the PEM file was generated, you can issue transactions from mxpydirectly.
The staking transaction
The following commands assume that the PEM file for your Wallet was saved with the name walletKey.pem in the current folder, where you are issuing the commands from.
The command to submit a staking transaction with mxpy is this:
mxpy --verbose validator stake --pem=walletKey.pem --value="<stake-value>" --validators-file=<validators-json-file> --proxy=https://gateway.multiversx.com --estimate-gas --recall-nonce
Notice that we are using the walletKey.pem file. Moreover, before executing this command, you need to replace the following:
- Replace
<stake-value>with the amount you are staking. You need to calculate this value with respect to the number of nodes you are staking for. See the beginning of the "Staking through the Wallet" section for info on how to do it. - Replace
<validators-json-file>with the JSON file that lists the nodes you are staking for. This JSON file should look like this:
{
  "validators": [
    {
      "pemFile": "valPem1.pem"
    },
    {
      "pemFile": "valPem2.pem"
    },
    {
      "pemFile": "valPem3.pem"
    }
  ]
}
The pemFile field should point to valid Validator PEM file. Note that paths must be relative to the JSON file itself.
Notice also that there is no calculation for "Gas Limit". If you provide the --estimate-gas argument to mxpy, the gas limit will be estimated automatically.
Here's an example for a staking command for one node:
mxpy --verbose validator stake --pem=walletKey.pem --value="2500000000000000000000" --validators-file=my-validators.json --proxy=https://gateway.multiversx.com --estimate-gas --recall-nonce
You must take denomination into account when specifying the value parameter in mxpy.
For two nodes, it becomes this:
mxpy --verbose validator stake --pem=walletKey.pem --value="5000000000000000000000" --validators-file=my-validators.json --proxy=https://gateway.multiversx.com --estimate-gas --recall-nonce
The --reward-address parameter
When you submit a staking transaction, the Staking SmartContract remembers the wallet you sent it from, and the rewards from your staked validators will go to that wallet. This is the default behavior. In this case, it will be the wallet which you used to generate the walletKey.pem file in the earlier subsection "Your Wallet PEM file".
Alternatively, you can tell mxpy to specify another wallet to which your rewards should be transferred. You will need the address of your reward wallet (it looks like erd1xxxxx…) for this, which you will pass to mxpy using the --reward-address parameter.
For example, a staking command for a single node, with a reward address specified, looks like this:
mxpy --verbose validator stake --reward-address="erd1qyu5wthldzr8wx5c9ucg8kjagg0jfs53s8nr3zpz3hypefsdd8ssycr6th" --pem=walletKey.pem --value="2500000000000000000000" --validators-file=my-validators.json --proxy=https://gateway.multiversx.com --estimate-gas --recall-nonce
The above command will submit a staking command and will also inform the Staking SmartContract that the rewards should be transferred to the wallet erd1qyu5wthldzr8wx5c9ucg8kjagg0jfs53s8nr3zpz3hypefsdd8ssycr6th .